Saturday, May 22, 2010

Hiking in the Springtime in Arizona's Madera Canyon


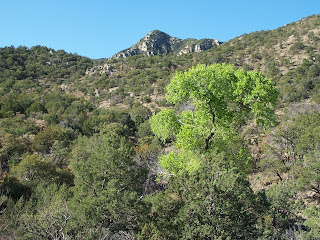
Elephant Head, Santa Rita Mountains, southern Arizona

Getting into the out of doors is one of our favorite things.  We like to go different places, but when we can't we still love going close to home.  Madera Canyon in the Santa Rita Mountains is nearby and we can get out of the desert and into the trees. 

And when you haven't been walking regularly, it's always nice to walk on a trail that doesn't beat you to death.  So we sometimes choose the Nature Trail in Madera Canyon.  You can join the Nature Trail in several locations along the canyon or you can walk the whole length. 
A few weeks ago--in early April--we were ready to enjoy the canyon's spring joys, so we started at the lower end of the Nature Trail which begins at the Proctor Parking Lot. The trail is uphill from this point, taking you alongside Madera Creek.

Can you tell that spring was springing?
The cottonwood trees were happy.

Madera Creek was running.

This is newsworthy in the desert.  Our mountains got quite a bit of snow this winter.  As the snow melts, the creeks run with beautiful cold, snowmelt.  Later in the year, these creeks will be dry.  So, for this desert rat, this blog post will feature WATER!


Next to the Nature Trail is a huge flat boulder that is a metate--a rock depression or hole used to grind things (mesquite beans, corn, etc.) into flour or meal.  A reminder of those who came before us. 


Here is Proctor Road at the mouth of Madera Canyon.  It's a favorite with bicyclists, hunters, and campers.  This road leads to the Proctor Ranch, which was begun by my great uncle Charles Proctor many years ago. 
 

The poppies near the trail were beautiful!!!


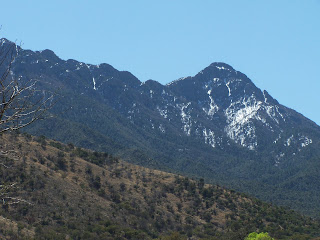
And . . . as we left the trail and headed to our car, one last look back at the mountain with some snow . . .


Be sure you figure out a way to spend some time in the outdoors soon! 


Friday, May 7, 2010

Camping in Madera Canyon--continued

Did you know these were hiking shoes and boots?  I didn't know the cowboy boots had the green uppers until we were sitting around the fire ring.  However, these boots tromped around camp and up the trail and served well while playing catch with the football and frisbee in camp.  And made me smile. 

Did you know that when you camp with six boys that you will see no wildlife?  Well, other than what is habituated to humans--like the camp robber jays and squirrels.  So, when you camp with six boys, don't expect to see deer or anything like that.  Just so you know. 

We camped for just one night.  More than that is really pressing it for at least one of the leaders.  And on this trip, one night was enough.  Some time in the night, the wind really came up and blew HARD!!  It was one of those winds where you could hear it rumbling down the hill and it seemed as though it was working hard to gather steam.  Then it got to your tent and shook it up for all it was worth.  Our tent fared well in the wind. It's had plenty of wind experience.  The bigger tent had some floppy places and the occupants got out, packed up, and put their tent away before breakfast.

Needless to say, while you're hearing the wind gathering speed as it roars down the mountain and through the trees, you don't sleep very well at all.  Here's a story about some other campers in a different location in the same mountains on the same night!

Oh, speaking of breakfast . . .

Each prepared their own breakfast in their own pan/plate.  You got your own ingredients:  eggs, cheese, etc.  Then cooked.  At least one of our campers had never cooked before so he figured it out quickly with coaching and by observation. 

After breakfast, another hike was in order.  Can you tell that the wind brought cooler temperatures?

We walked from the campground along the trails to the Santa Rita Lodge to visit their bird feeders.  They have many interesting visitors. 

I took these photos while the others were in the gift shop getting hot drinks.


Then it was a hike back to camp and lunch!!


Oh, are you detecting a trend here?  One camper described our camping trip:  You get to camp, set up the tent, eat, then hike, stop and eat, then hike back to camp, then you cook!"

Sounds just about right to me . . .

I hope you get your own outdoor adventures soon. 


Wednesday, May 5, 2010

More Soap Making Information! Terms and How-To

Anne Marie at Soap Queen has another video about making cold process soaps.  It discusses terms (just what is "trace?") and other basics.  She's holding back on the recipe, though, because she wants you to focus on the basics before you get caught up in the specific ingredients.  Here is the video!


How to Make Cold Process Soap: Basic Terms, Episode 2 from Soap Queen on Vimeo.


Isn't this great?!  If this doesn't seem like all that much fun to you, or too much work, or you just have too much other stuff going on (gee, is life too hectic?) to do this, visit The Yard Woman online or in Tubac, Arizona to get my soaps.  You can also find my soaps at http://www.lucindasnicethings.etsy.com/


"Against the assault of laughter, nothing can stand."
Mark Twain

Monday, May 3, 2010

Camping in Arizona's Madera Canyon


We love to camp and hike.  We love the outdoors.  We especially love it when we can get into some higher country and enjoy the trees and the smells and the sounds. 

A little over a month ago, we went hiking with our friends and some of the members of their 4H group.  The group decided to camp close to home at the Bog Springs Campground in nearby Madera Canyon.  It's a beautiful place in one of Arizona's "sky island" mountain ranges--the Santa Rita Mountains. 

Of course, when you arrive at camp, the first order of business is to set up housing.  Our little backpacking tent is this orange and blue one.  The bigger tent for the 4H leaders and the kids is the one that's going up in the distance in the picture below.  Are we smart, or what?


Below, everyone helps get the big tent set up!


Then you know the next order of business is food!

This is the trail mix container.  Everyone contributed a bag of something for the trail mix tub.  M&M's are my favorite in this tub!!  Once all the ingredients were poured into the tub, the 4H leader asked the kids if they'd stirred it up yet.  The response, "Ooohhh, that's why you call it trail mix!"  Sigh.  Oh, and did you know that dried apricots look like red blood cells.  I learned so much on this camping trip . . .

Then came lunch!!


And a hike!

This is the Dutch John Trail that takes off from the east side of the Bog Springs Campground.  We went for about a mile UP the trail (you can see that UP is the operative word here) to a spring and a nice shady spot with lots of trees and boulders.  Here are a brother and sister enjoying a peaceful rest on a big boulder.  And some of the trail mix!


And a couple of buddies on another boulder . . .

More later when I share with you some of the appropriate footwear for camping and hiking in the mountains of Southern Arizona!!

Have a good week!

Saturday, May 1, 2010

Soap--Cutting and Curing--It's Kinda Magic

In my previous posts, I talked about getting your soaping equipment together and the soap making process.  I also linked to some nice videos, websites, and other blogs that give great information about making cold process soap. 

Now--where did we leave off?  Oh, yes, the soaps were in the molds.

Once you've let your soap sit in the molds for a day or two, it's time to get them out of the molds.  If you use oddball things for your molds, some release the soaps better than others.  Some last longer than others.  Some soaps cooperate better than others (oatmeal and honey is nice, shea butter is, well, stubborn). 

This is a photo that I showed earlier and you can see the various molds that I used for this batch of oatmeal and honey.


Not shown here are some "real" molds that are budget molds that I got at Brambleberry and Snowdrift Farm.  I line them with freezer paper with the shiny side facing the soap.  That helps the soap release easily.  Those molds are very nice, but they must have been saved for another soap (like the stubborn, but luxurious shea butter soap).  I'm just not sure how long they will last with the heat of the cold process soaps.  After a few batches, they're starting to warp.  I'm saving my pennies for one of the nice wooden molds!

I also use a drywall mud tray as a mold (at the top in the photo above).  It's not flexible at all, so I make sure to line it with freezer paper so my soap comes out.  It makes a pretty big bar of soap if you fill it or it makes a nice hand sized bar if you fill it just over half way. 

The "hospital" molds are very flexible plastic so I can flex them like an ice cube tray and convince the soap to come out pretty easily. 

The microwave dessert mold works well with some soaps such as oatmeal and honey, but not so well with others, such as shea butter.  And those molds work only two or three times before they break while you're trying to push the soap out.  They make fun looking soaps, though.  My mother loves to help make more of those molds available to me by eating the dessert out of the "molds!"

The silicon candy molds or baking pans (not in the photo) make great soap molds.  You have to support them on a flat and level surface or you get slanted soaps.  If that's the look you want, great.  When you're ready to unmold the soaps in the silicon molds, you'd better be ready because those soaps are practially FALLING OUT of the molds!  Some of the soaps may still be a bit soft, so you may need to gently pry the sides of silicon pans away from the edges of the soap so the soap doesn't come apart. 

Once you get the soaps out of the molds, you need to cut them.  I use a stainless steel dough scraper.  I cut my soaps about 1" thick.  They shrink a bit while they're curing, I'm pretty sure. 

After you cut them you need to let them cure.  That means sit.  Not used.  FOR A MONTH!!  Or maybe more. 

I put my soaps in cardboard box lids with paper towels or freezer paper in the bottom.  I turn the soaps every so often so all sides get exposed to the air.  Here are some boxes stacked up with soaps!


I keep my soap recipe with the soaps along with the date that the soaps came out of the mold.  That way I'll know when they should be cured and ready to be used. 

The little ball soaps are shea butter soaps that wouldn't come out of the molds easily.  When you make shea butter soap, make sure your molds are really prepared well to allow that soap to come out of the mold.  Otherwise, you end up with lots of little soap balls 'cause you had to use a spoon to scoop it out of the molds and a broken spatula 'cause you tried to pry the shea butter soap out of the mold.  Sigh . . .


Above shows patchouli in the top--smells good!  Honey and oatmeal is the orangish soap in the bottom.  I guess the particular honey I used made it that color.  Plus it's still pretty soft at this point.  A month later, it's mellower in color. 

The smell from the soap curing room (the back bedroom) is nice when you go by . . .

Here are some hearts from the silicon candy mold that makes tiny soaps:

You can see that one or two look a bit "drunk."  Those were the ones that weren't level.  A couple have "patches."  Those didn't come out of the mold so easily.  After I took those two out, I put the mold back and waited until the next day to take the rest out.  That worked much better!

After the soaps cure, then they're ready to be used.  If you want, you can use a vegetable peeler to peel off the rough edges (save the shavings for the laundry!), add some pretty decoration and a label and then you have something like this!


Now, I'm not saying I know it all, 'cause I don't!  Not by a long shot.  I have lots to learn and try new things every time I can.  What I do is pretty basic stuff, but they sure come out creamy and nice to my skin!!

Thanks for visiting and, if you have any ideas for future soaps, please let me know!